
Sequence Diagram
You can create UML Sequence diagrams.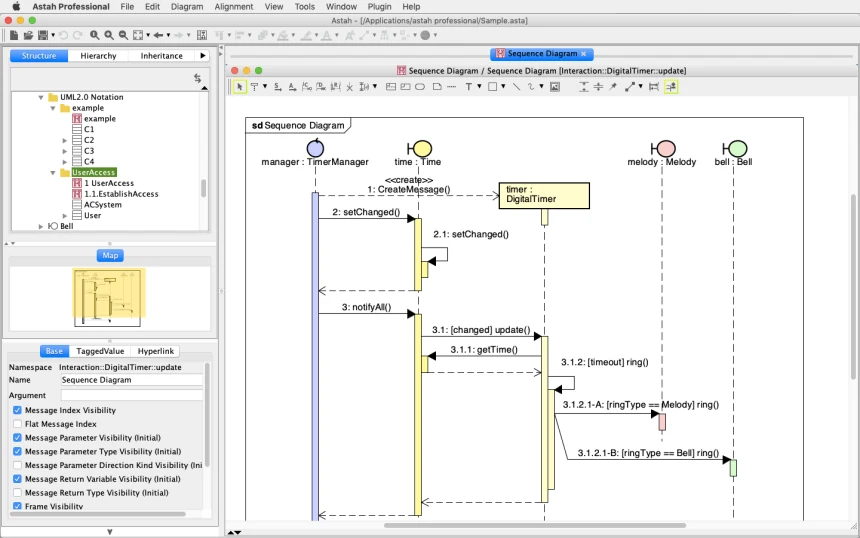

Diagram Properties
You can set diagram properties, such as visibility settings, in the Property view (bottom-left pane).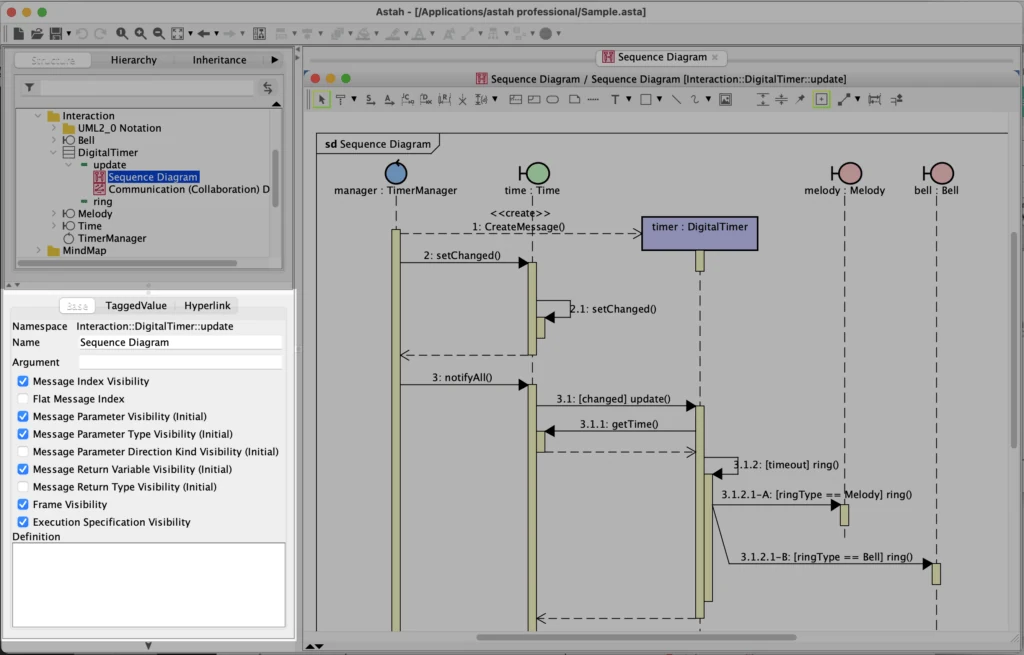
Automatic Diagram Layout
Since version 8.5 of Astah Professional and Astah UML, automatic diagram layout is available.
To use the auto-layout, go to [Alignment] – [Auto Layout] – [Vertical / Horizontal].
However, this auto-layout does not work for CombinedFragments. You will need to reposition CombinedFragments manually, so the [Gap Expander] and [Gap Remover] options may work better if your Sequence diagram contains several CombinedFragments.
Lifeline
You can create a lifeline by double-clicking on a diagram, or by choosing it from the tool palette and clicking on the diagram.
Since version 9.2, you can create a Lifeline by dragging a Component from the tree view and dropping it on the diagram.
Adding a BaseClass
There are three ways to add a base class to a Lifeline.
1. Directly type in a Lifeline
You can add a base class to a Lifeline by directly typing its Class (Block) name after the Lifeline name.
2. From Lifeline’s property view
- Select a Lifeline.
- Go to the property view (bottom-left pane) and click the [New] button.
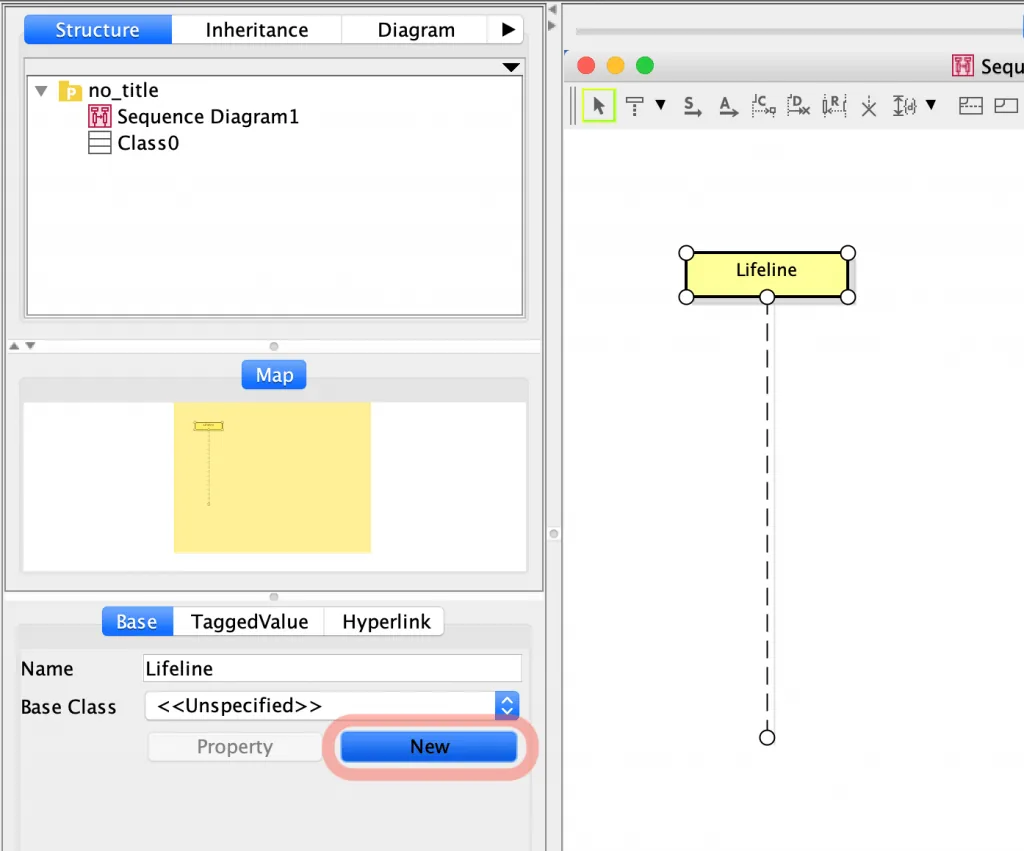
- A pop-up appears where you can specify a class.
3. Drag a Class to Lifeline
You can drag a Class onto a Sequence diagram to create a lifeline with the class as its base class.
Show Actor as Lifeline
By dragging an Actor from the tree onto the diagram, you can show a Lifeline as an Actor on the Sequence Diagram.

Adjust Lifeline length
After creating a Sequence diagram, you may want to adjust the length of Lifelines to clean up the diagram. Right-click on the diagram, then select [Adjust Lifeline Length] and choose from these three options.
Options
| Default | Make all the lifeline to the shortest possible. |
| Align to Minimum | Make all the lifeline to the same length as the shortest one on the diagram. |
| Align to Maximum | Make all the lifeline to the same length as the longest one on the diagram. |
ExecutionSpecification
Minimize Execution Specification’s length
To clean up Sequence diagrams, you can minimize the length of Execution Specifications.
Right-click on the diagram, then select [Adjust ExecutionSpecification Length].
Hide Execution Specification
You can hide Execution Specifications. This is available in Astah Professional, UML, and System Safety editions only.
- Click anywhere on a diagram.
- A property view for the Sequence diagram opens in the bottom-left pane.
- Uncheck [Execution Specification Visibility].

Message
Found Message
You can create a Found message.
- Select [Synchronous Message] or [Asynchronous Message] from the tool palette.
- Click on the diagram.
- Click on a target lifeline.

Lost Message
You can create a Lost Message.
- Select [Synchronous Message] or [Asynchronous Message] from the Tool palette.
- Click the Lifeline that you want to be the origin of the Message.
- Click on a diagram.

Gate
You can create a Gate.
- Select [Synchronous Message] or [Asynchronous Message] from the Tool palette.
- Click on the diagram frame.
- Click a Lifeline.

Reply Message
There are two ways to create Reply Messages.
Create manually
- Select [Reply Message] from the tool palette.

- Click the ExecutionSpecification that you want to be the origin of the Reply Message.
Create Automatically
- Turn on [Reply Message Mode] in the tool palette.

- Create a Message.
- A Reply Message is generated automatically.
CombinedFragment
You can create CombinedFragments.
- Select [CombinedFragment] from the tool palette.
- Specify the area where you want to create CombinedFragment. The area should include at least one Lifeline.
Add an Operand
There are two ways to add Operands to CombinedFragments.
Create from pop-up menu
- Right-click on a CombinedFragment.
- Select [Add operand].

Create from Property View
- Select a CombinedFragment on the diagram.
- Go to the property view (bottom pane) and choose the [Operand] tab.
- Click the [Add] button to add operands.


TIPS: Define loop in the CombinedFragment
You can enter loop conditions (text and numbers) in the CombinedFragment’s Property View.

InteractionUse
You can create InteractionUse.
- Select [InteractionUse] on a tool palette.
- Drag to specify where you want to place the InteractionUse.
You can create InteractionUse within a CombinedFragment as well.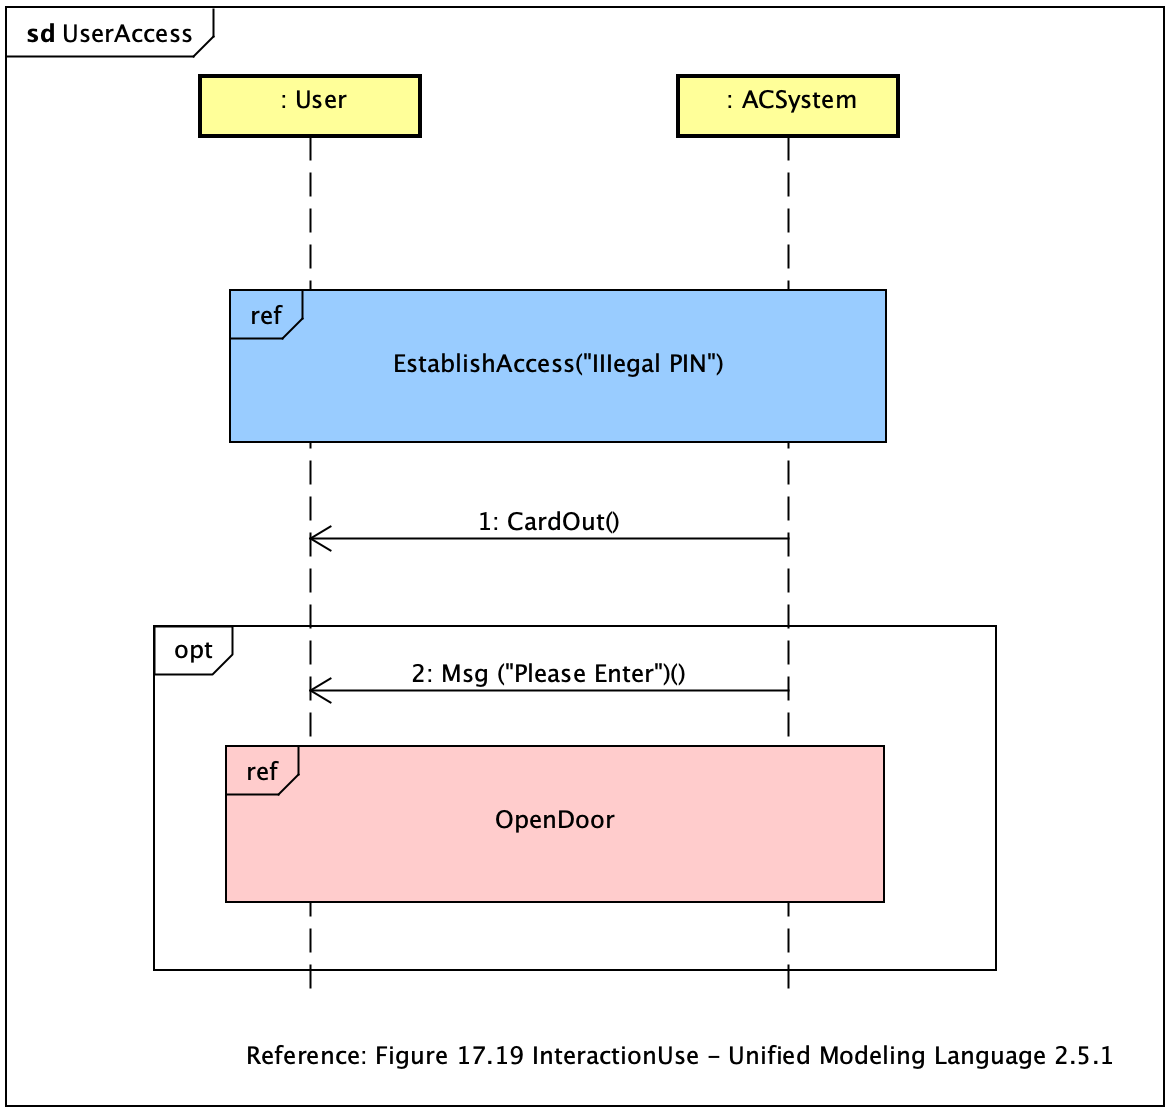
Auto-generate Sequence Diagrams
Starting from version 11, Astah Professional and Astah UML can automatically generate Sequence diagrams from source code with AI Code Reverse. For details, see the AI Code Reverse page.