
Class Diagrams


Create a Class Diagram
To create a new UML Class Diagram:
- Open the Diagram menu.
- Select Class Diagram.
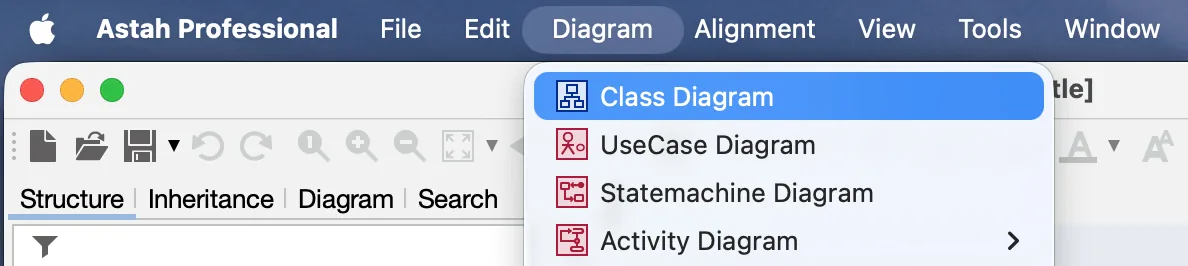
A new Class Diagram canvas will appear in the editor.
Auto-create Class Diagrams
Astah can automatically generate Class Diagrams from Packages. This is useful when you want a quick visualization of an existing model or imported source code.
Before You Begin
If you are working with source code, import it first:
If you are using Astah Professional or Astah UML version 11 or later, you can also use AI Code Reverse to automatically generate Class diagrams from source code. For details, see the AI Code Reverse page.
Generate a Diagram Automatically
- Right-click a Package in the Tree view.
- Select Auto Create Class Diagram.

You can choose from three presentation options.
1. Simple
Generates a diagram containing Classes only. Attributes and operations are not displayed.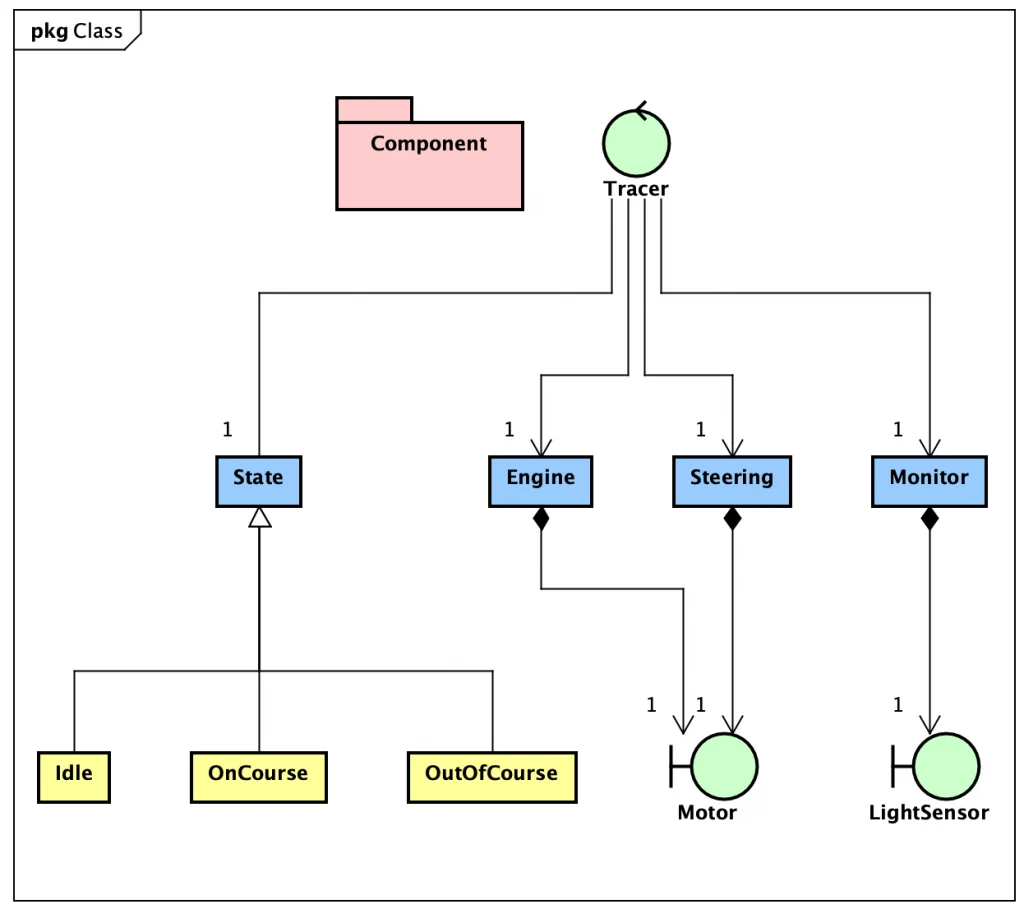
2. Detailed
Generates a diagram including classes, attributes, and operations.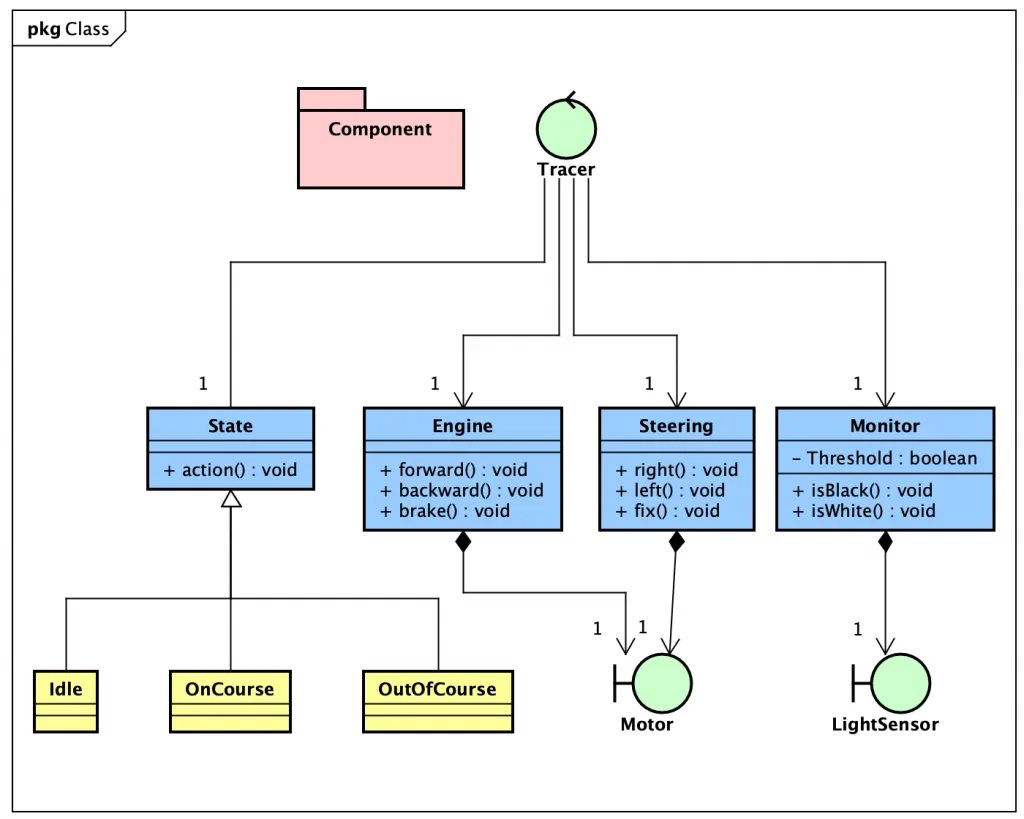
3. Unpack Subpackages
Generates a diagram including all models inside the selected package and its subpackages.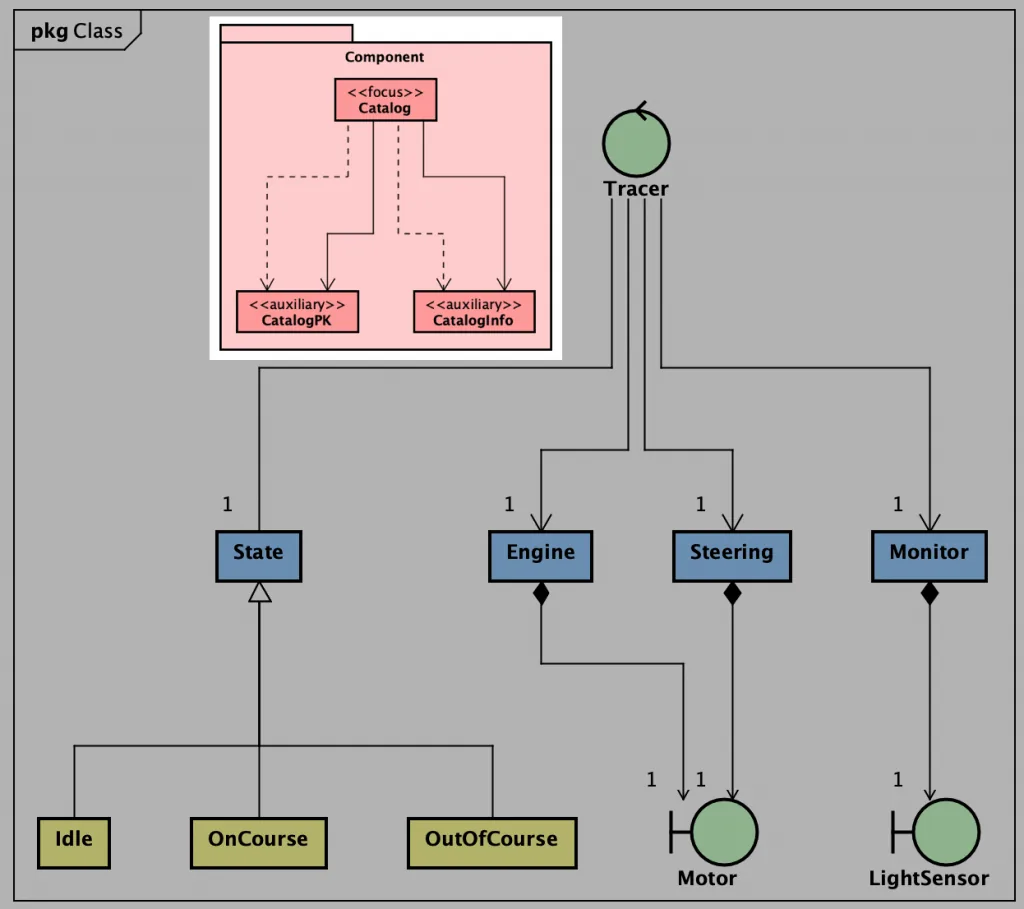
Class
Create a Class
There are five different ways to create a Class in the Diagram Editor. For a full list, refer to the Diagram Editor documentation.
Controlling Displayed Information in Classes
You can customize the appearance of Classes – such as choosing which details to display – via the [Extended Visibility] menu.
Template Classes
A Template Class allows you to define template parameters (generics).
Create a Template Class
You can add template parameters in two ways:
- Right-click the class and select Add Template Parameter.

- Enter details in the Template Class tab in the bottom-left Property view.

Attributes
Attributes represent the data fields of a Class.
Add an Attribute
You can create attributes using:
1. Draw Suggest
Hover over a Class and click the orange diamond.
2. Keyboard Shortcut
When an attribute is selected, press Enter to create another.
3. Paste Text
You can paste copied text to create multiple attributes at once.
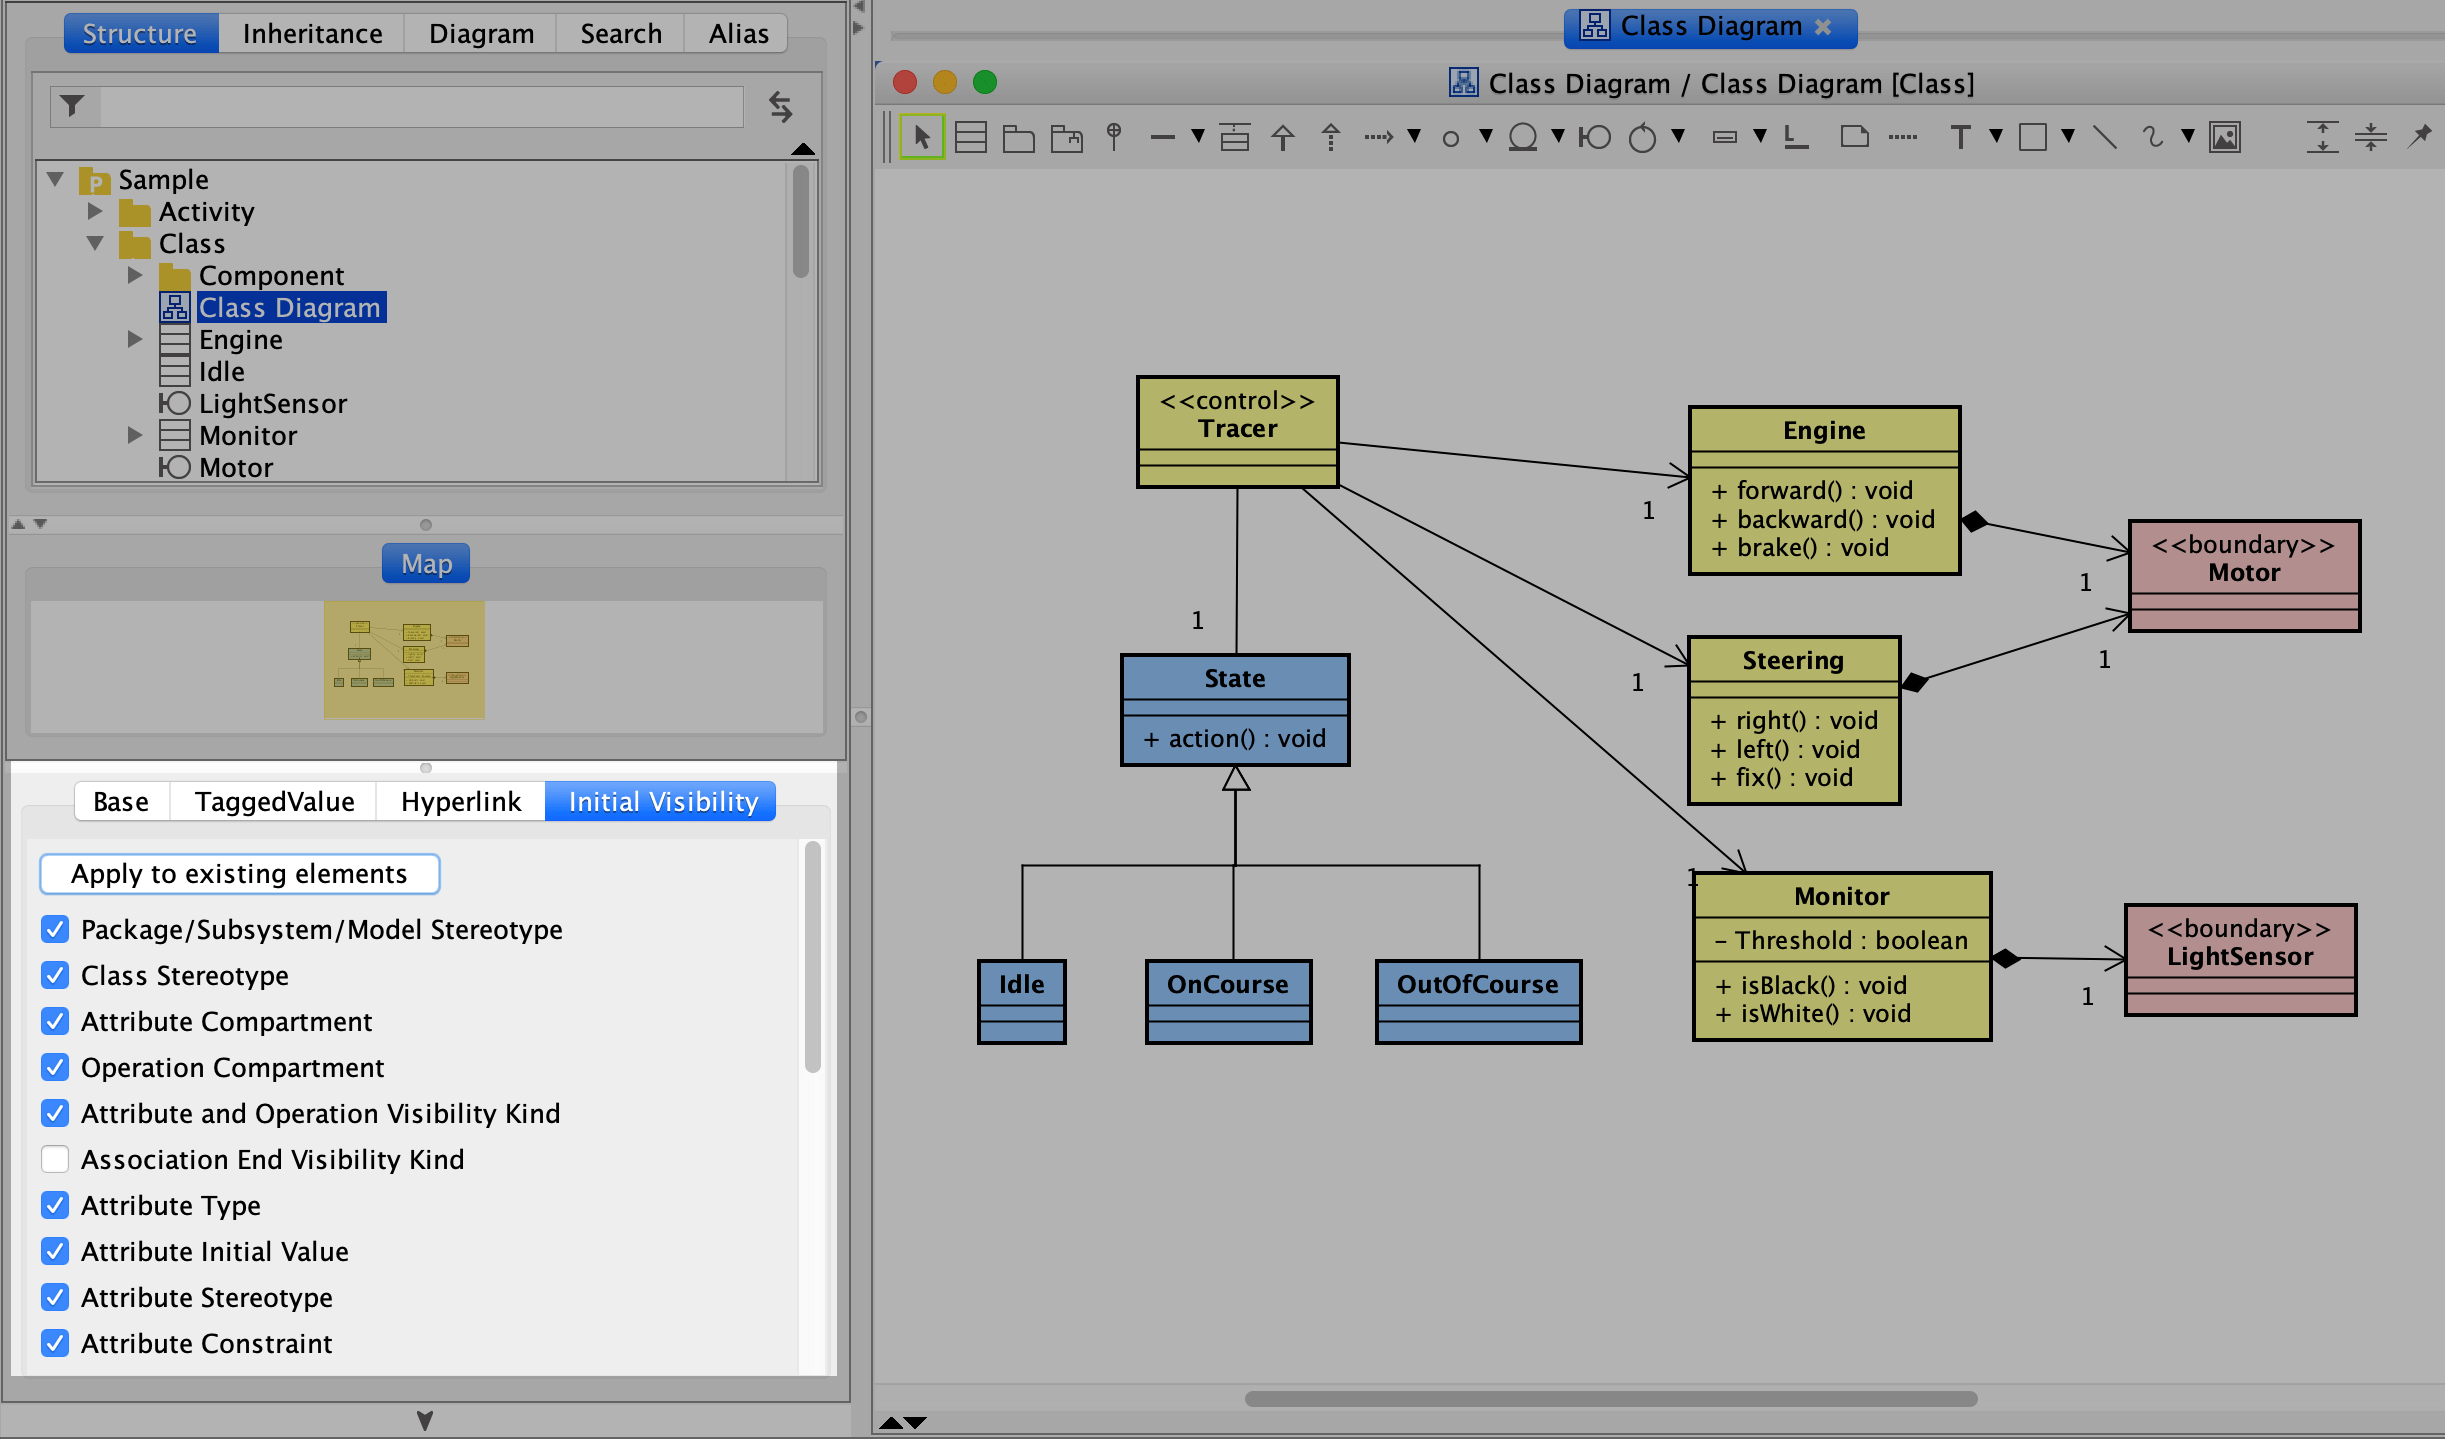
Attribute Visibility
To show or hide attributes:
- Open the Initial Visibility tab in the bottom-left Property view.
- Select the visibility options.
- Click Apply to existing elements.
Operations
You can create Operations by hovering over a Class and clicking the green bar that appears.
Another way is to press the [Enter] key while an operation is selected.
Moving Attributes/Operations
Attributes and operations can be moved by dragging them within a class or to another class.
Since version 8.5, you can add Operations by pasting copied text.
Anonymous Bound Class
You can create an anonymous bound class by deleting the name of a Bound Class.
Anonymous Bound Classes can be used for the following:
- Attribute Type
- Operation Return Value
- Operation Parameter Type
- The target of Association End A and Association End B
- Base Class of Instance Specification in Class
- Base Class of Object Node in Activity Diagram
- Base Class of Lifeline in Sequence Diagram and Communication Diagram
Example of creating a Bound Class
- Create a bound class.
- Create a new class and add an attribute whose type is the bound class.

- When you add the class, you will be asked if you’d like to create a new class. Click [Yes].

- Right-click and select [Show Hidden Relationship] from its pop-up menu.

- The relationship to the anonymous bound class is now shown.

Nest a Class
You can nest a class within a package by dragging it into the package.
Enumerations
- Choose [Enumeration] from the Class drop-down menu on the tool palette.

- Click in the diagram editor to place it.

Enumeration Literals
There are three ways to create Enumeration Literals:
- Using Draw Suggest: Hover over an Enumeration and click the purple mini bar to add a new enumeration literal.

- Using the context menu: Right-click an Enumeration and select [Add Enumeration Literal].

- From the Property view: Select an Enumeration, then in the Property view (bottom-left pane), click the [Enumeration Literal] tab and click [+].

Association
To create associations, hover over a Class, select the appropriate association type from the icons, and click the target models. For more details, see the “Drawing Lines” section.
Jump to Association Ends
You can navigate to the Association ends by right-clicking the association line and selecting [Move to related element].
Relocating Association Names
If association names drift from the line, right-click the line and select [Init Label Position] to reset the label’s position.

Association Class
Create an Association Class
- Click the Association Class tool in the palette.

- Click the two Classes that the Association Class should connect.
Astah will place the Association Class between them.