Floating License Guide
License Server Management Guide
This guide is designed for Reprise License Manager (RLM) v16.0.
- If you need to upgrade to RLM v16.0, refer to the Upgrade guide.
- For further details, consult the official Reprise manual, accessible via the [Documentation] menu on the RLM Web Server.


View License’s Expiration Date
- Open your web browser and go to https://<Hostname>:5054.
- Click [Home].

- Click the arrow next to [cvastah] to view license details.

- The expiration date for each license will be displayed.

You can also check the license expiry date in CV Members.

View License Usage
- Open your web browser and go to: https://<Hostname>:5054.
- Click [Home].

- A list of managed licenses will appear. Click the arrow to view license details.

- It opens up the detail of the selected license.


Release license off assigned users
You can remove users from the active-user list to make the license seat available for other users.
- Open a License Usage list.
- Click [Remove] button to get the person off the list.


Using RLM across a Firewall
RLM License Server uses two TCP Ports.
- 5053(default)
- A dynamically assigned port
If you have a firewall installed on the network, the firewall will not allow access to these ports and a connection to the License Server from the clients will be blocked. So you need to change the port number by editing your license file. If you have several license files stored in the license sever, make the same change to all the license files.
When you open a license file, you will see the first two lines as below:
HOST ANY xxx.xxx.xxx.xxx 5053
ISV cvastah
The line starting with HOST is the configuration for the License Server. xxx.xxx.xxx.xxx shows the ID of the license server – you cannot change this ID. 5053 is a port number that the license server uses.
Another line starting with ISV is a configuration for the cvastah service, and it indicates that this works with a dynamic port. You can change both port numbers like examples as below:
Example) Changing the HOST Port to 5055 and ISV to 2385 on Windows
HOST ANY xxx.xxx.xxx.xxx 5055
ISV cvastah port=2385
You have to restart the license server after making the change. Also, make sure to configure your firewall to allow access to these ports you set.

SSL Certificate Configuration (v16.0 and later)
RLM v16.0 requires SSL encryption to access the Web Server. During the initial access, a self-signed SSL certificate is automatically configured, but if you want to use an SSL certificate issued by a private or official certification authority, specify the following execution options.
For Windows:
1. Open register_service.bat file, which is included with the Windows version, in a text editor. Edit {path to SSL certificate} and {path to SSL private key} to match your environment.
2. Replace the following line:
rlm -ws %REPRISE_PORT% -dlog "%LOG_FILE%" -install_service -service_name
"%SERVICE_NAME%"
with
rlm -ws %REPRISE_PORT% -dlog "%LOG_FILE%" -install_service -service_name
"%SERVICE_NAME%" -sslcert {path to SSL certificate} -sslprivkey {path to SSL private key}
3. Run delete_service.bat to delete the service once.
4. Run the edited register_service.bat to re-register the service.
5. Restart the service and access the RLM Web Server via your browser.
6. Verify that the SSL certificate is configured as intended.
For Linux:
1. Open the license manager’s unit file.
2. Locate the line beginning with ExecStart and add -sslcert {path to SSL certificate} -sslprivkey {path to SSL private key}. Edit {path to SSL certificate} and {path to SSL private key} to match your environment.
3. Reload systemd:
systemctl daemon-reload
4. Restart the license manager:
systemctl restart rlm
5. Restart the service and access the RLM Web Server via your browser.
6. Verify that the SSL certificate is configured as intended.

Access Control (v16.0 and later)
If your license server is v16.0 or later, you can manage users who access the Web License Server. By setting user permissions, you can restrict the actions that users are allowed to perform.
For detailed information about permissions, please refer to the RLM manual.

Change your License Server Machine
- Set up the RLM license server on the new machine by following the instruction here.
- Get the Host ID of the new machine by following the step here.
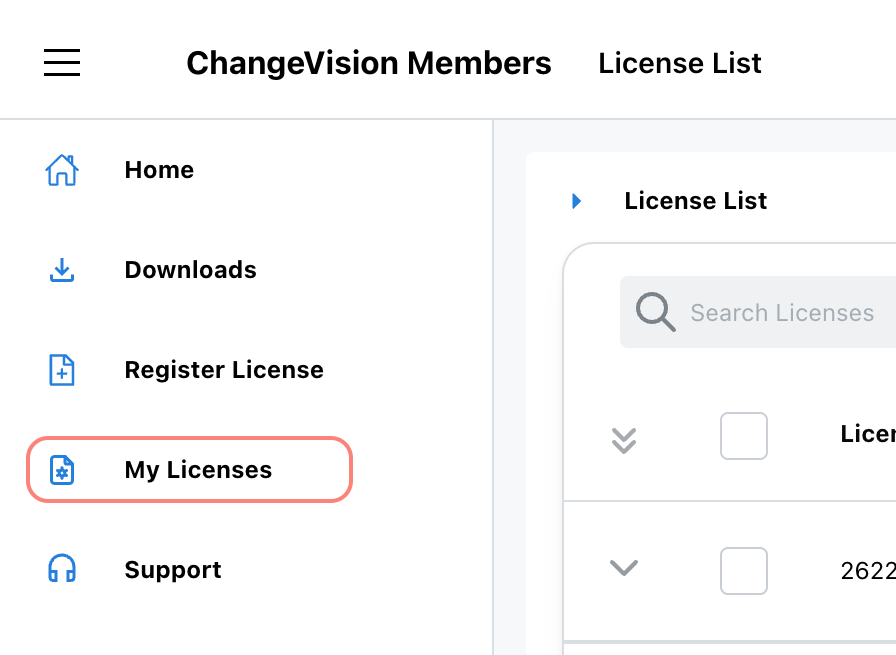
- Login to CV Members and select [My Licenses].

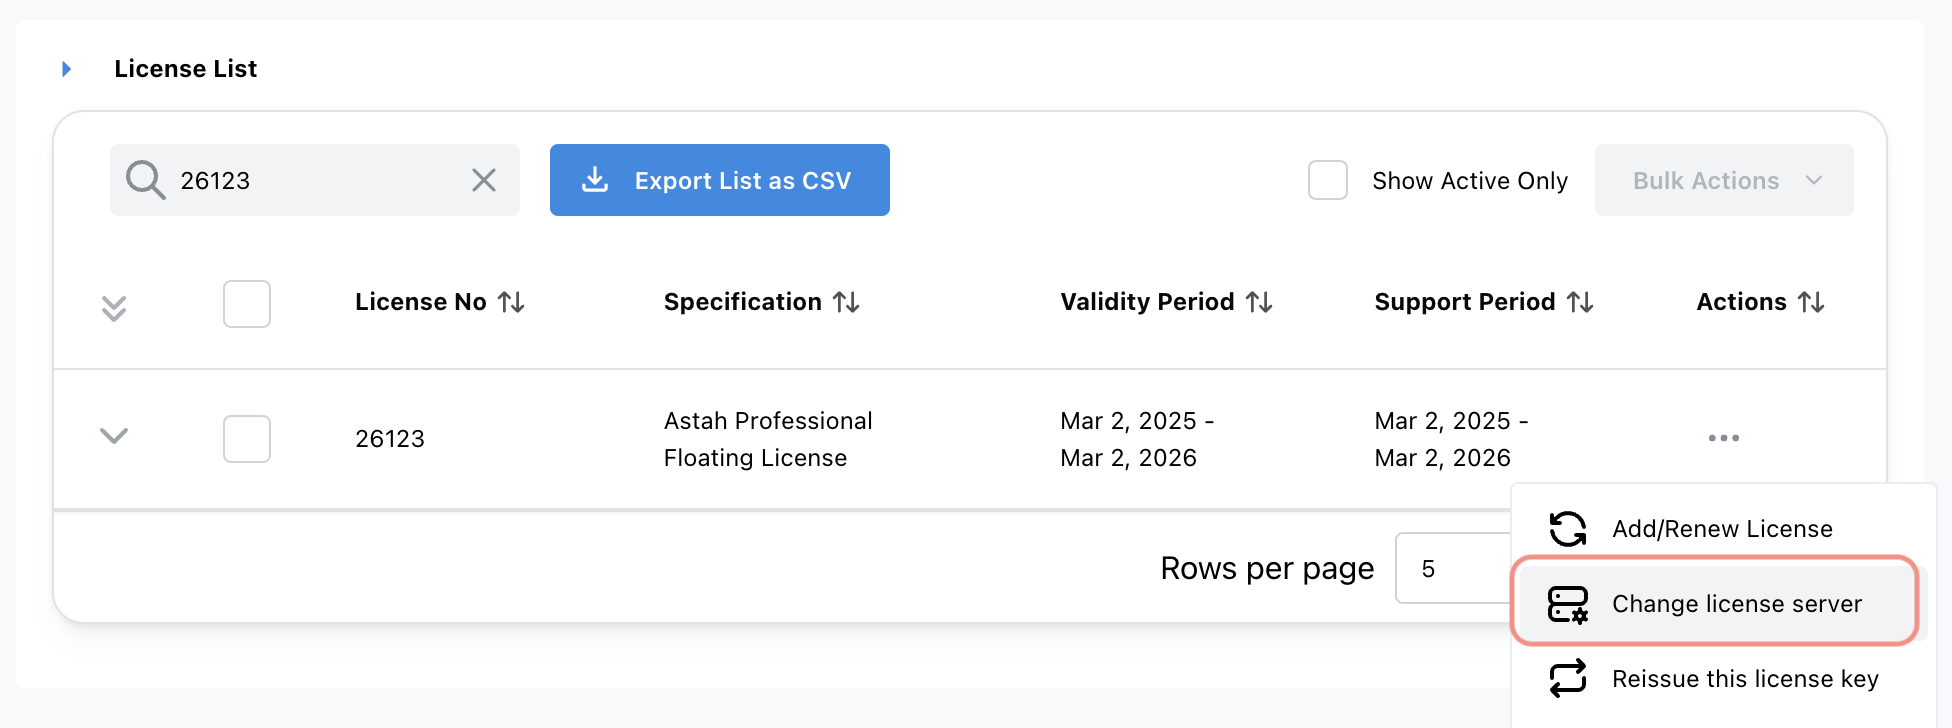
- Select your Floating License and select [Change license server].

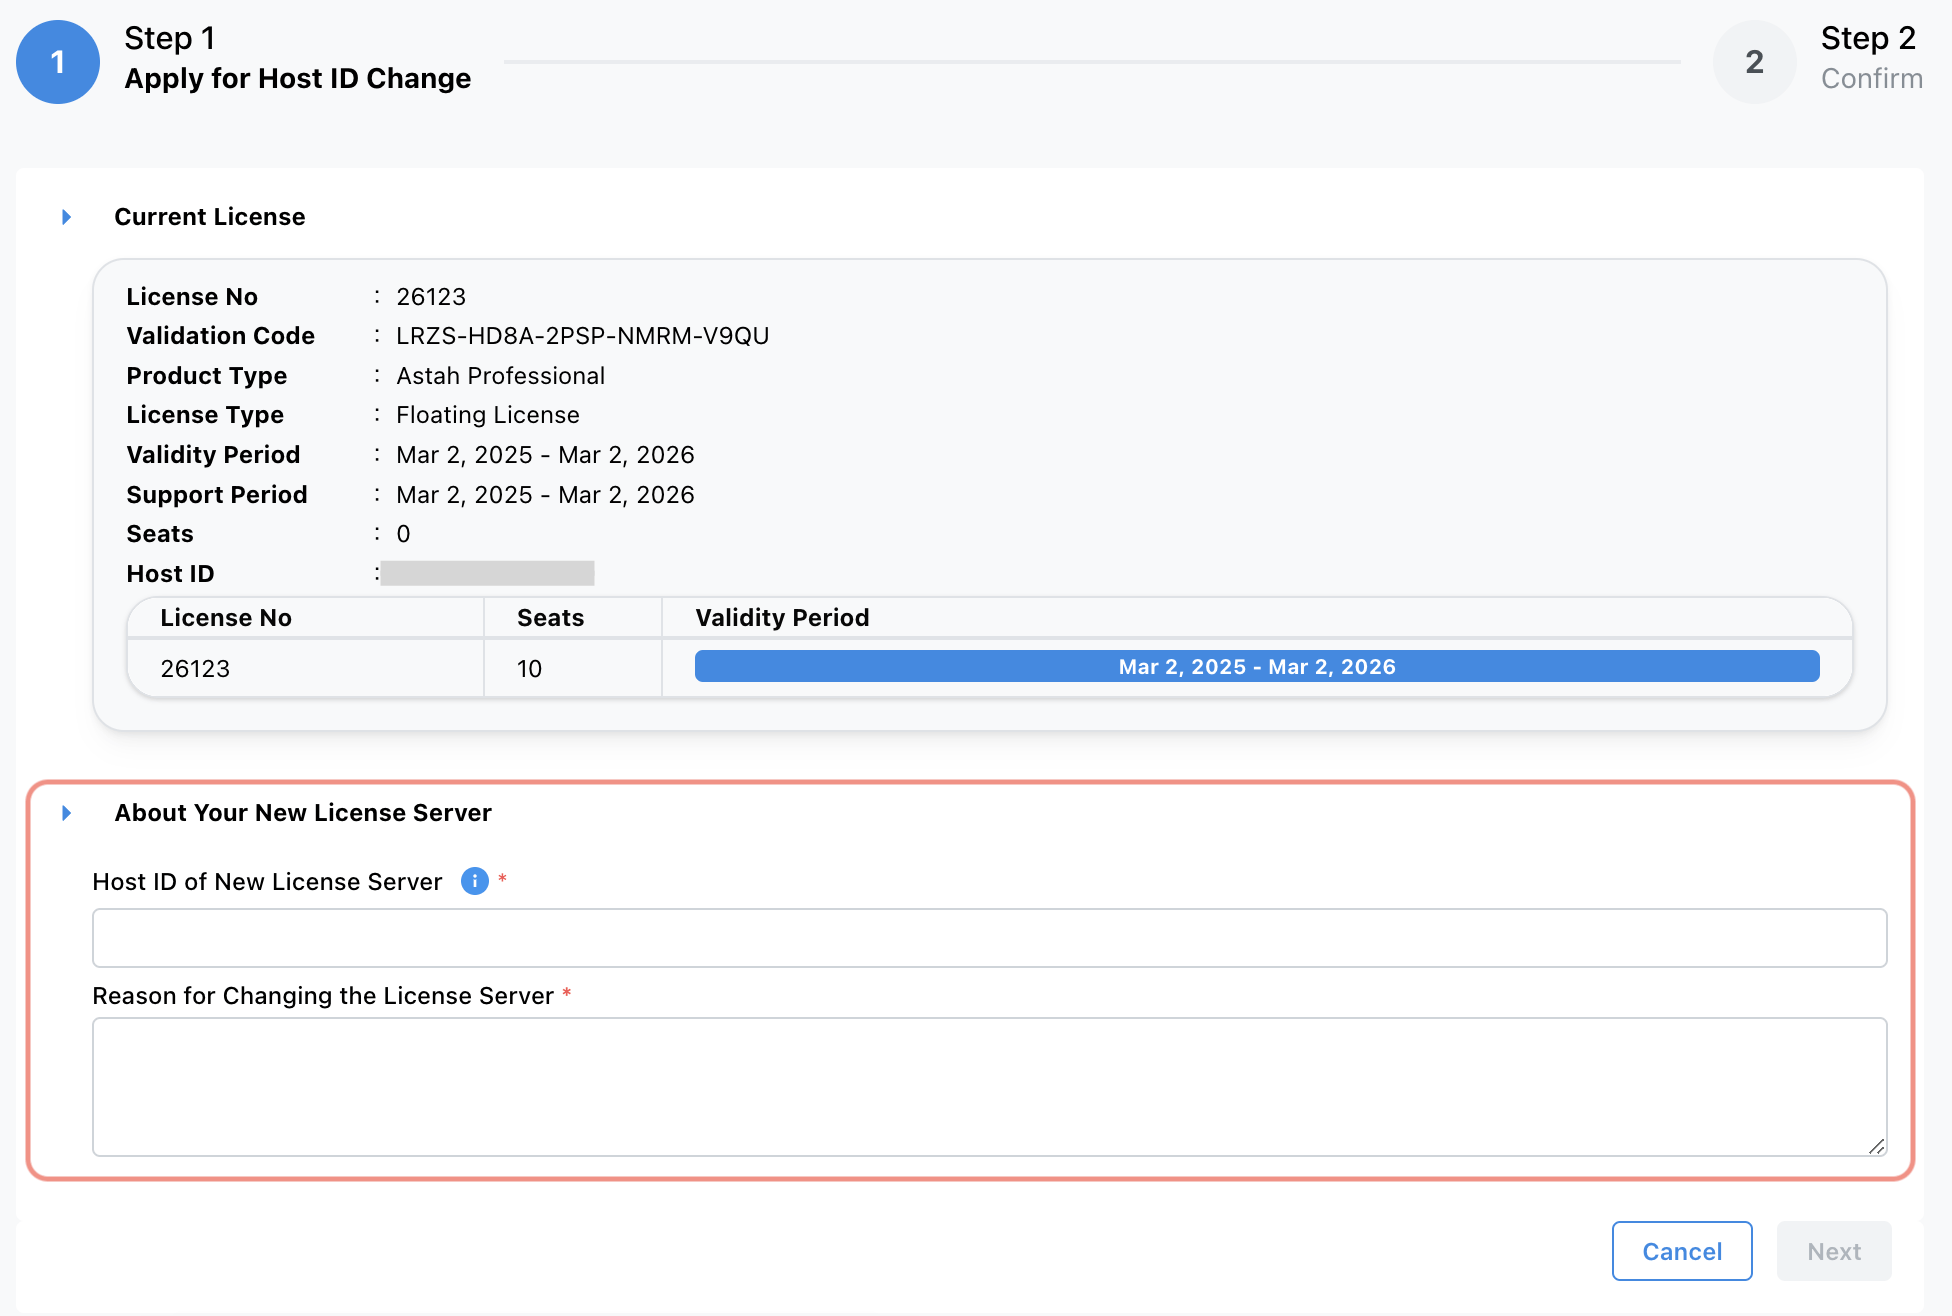
- Enter the new Host ID and provide a reason for the change, and click [Next].

- Read the agreement that appear and click [OK] button.
- You will receive the confirmation email with instructions with access to updated license file.

Uninstall the License Server
You can uninstall the License Server when you no longer need it.
Windows
- Delete the service
- Delete the RLM License Server Installation folder
Linux
- Delete the daemon that launches the RLM License Server
- Delete the directory where you installed the RLM License Server

Using the Options file
By modifying the options file “cvastah.opt“, you can customize how the License Server works to make it more useful for you. Here’re a few options that you may want to use. Also, make sure to restart the license server after you modify this option file.

Export License Usage Report
By adding REPORTLOG option, you can produce detailed report logs for the license activity.
Format
REPORTLOG [+]file_path [std | small | detailed] auth
By adding + to the beginning of the file path, the report log never overwrites the other even after restarting the license server.
Example) Export log to C:\astah\rlm\usage.log in std format. No overwriting.
REPORTLOG +C:¥astah¥rlm¥usage.log std auth
Also, you can use the ROTATE option to set the rotation of the log file.
Format
ROTATE [daily | weekly | montly | #days ]
Example: Set rotation as 30days
ROTATE 30
For more information about this REPORT LOG options, please refer to the RLM Manual.

Control Access
By adding INCLUDEALL option, you can control the access from the clients to the license server.
Format
INCLUDEALL [user|host|group|host_group|internet|
internet_group|project] who
Example: Grant privilege to John on pc1 with IP address 172.16.7.x
INCLUDEALL user john
INCLUDEALL host pc1
INCLUDEALL internet 172.16.7.
For more information about INCLUDEALL options, please refer to the RLM Manual.

Control Access per License
By adding INCLUDE or EXCLUDE option, you can control the access of the users per license.
1. Open a license file(.lic) and add the same ID of “options=_id=nnnn” as new to the LICENSE line.
Example: Adding id=00000001
LICENSE cvastah product 1.0 dd-mm-yyyy 10 share=uh _id=00000001
issued=21-nov-2018 options=_id=00000001 _ck=xxxx sig="xxxx"
2. Now modify the option file
Format
INCLUDE/EXCLUDE astah-professional user|host|
group|host_group|internet|internet_group|
project who id=nnn
e.g. Giving access by IP Address for Astah Pro’s license id=0000001
INCLUDE astah-professional internet 192.168.* id=00000001
e.g. Giving access by User Group for Astah Pro’s license id=0000001
GROUP engineers tom dick harry
INCLUDE astah-professional group engineers id=00000001
For more information about these options, please refer to the RLM Manual.

Stop Roaming
By adding the following line in the option file, you can stop anyone from roaming the license. You must restart the License Server after alerting to apply this change.
For Astah Professional
ROAM_MAX_COUNT 0 astah-professional
For Astah UML
ROAM_MAX_COUNT 0 astah-uml